Masks
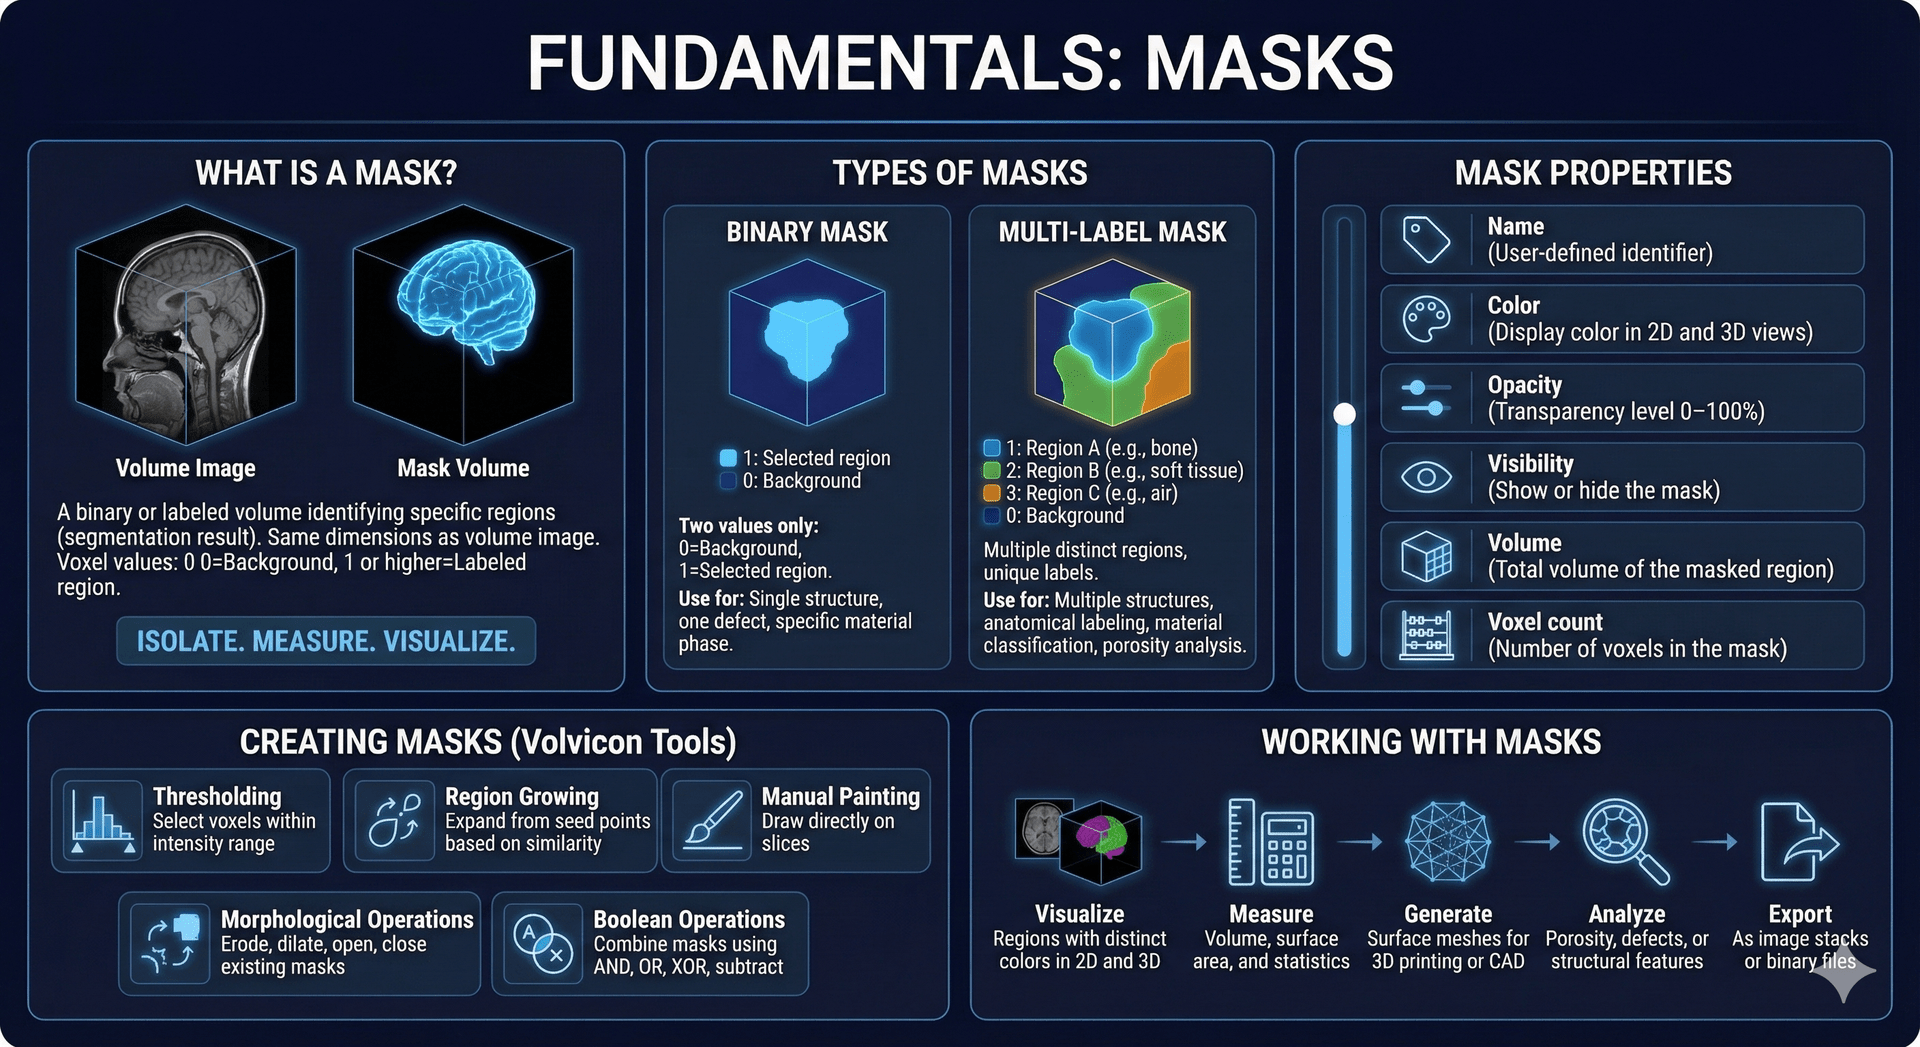
A mask is a binary or labeled volume that identifies specific regions within a volume image. Masks are the result of segmentation—the process of separating objects or structures from the background.
What is a Mask?
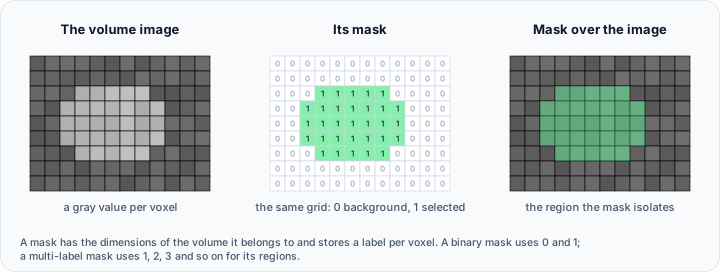
A mask has the same dimensions as the volume image it belongs to. Each voxel in a mask contains a label value:
- 0 = Background (not part of the region)
- 1 or higher = Part of a labeled region
Masks allow you to isolate, measure, and visualize specific structures independently from the rest of the data.
Binary Mask
A binary mask contains only two values:
| Value | Meaning |
|---|---|
| 0 | Background |
| 1 | Selected region |
Use binary masks when you need to identify a single structure or region, such as:
- A single organ
- One type of defect
- A specific material phase
Multi-label Mask
A multi-label mask can contain multiple distinct regions, each with a unique label value:
| Value | Example |
|---|---|
| 0 | Background |
| 1 | Region A (e.g., bone) |
| 2 | Region B (e.g., soft tissue) |
| 3 | Region C (e.g., air) |
| ... | Additional regions |
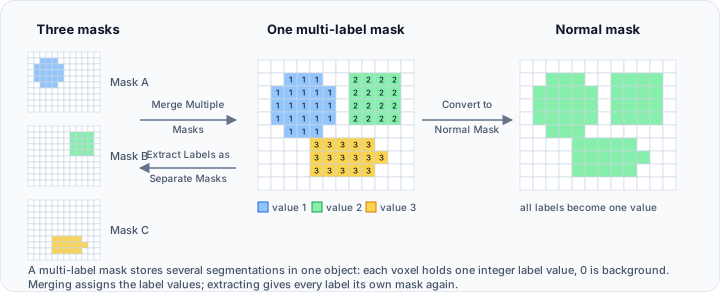
Multi-label masks are useful for:
- Segmenting multiple structures at once
- Anatomical labeling
- Material classification
- Porosity analysis with pore identification
Importing Masks from Files
A mask can be imported from a file through File → Import → 3D Images as Masks. The file has to contain a label image, not a grayscale image.
Requirements
| Requirement | Detail |
|---|---|
| A volume must already be open | A mask is defined against a volume, so the project needs a volume image before a mask can be imported |
| One value per voxel | Colour images with several components per voxel are not accepted |
| Label values from 0 to 65535 | Values are read as whole numbers in the unsigned 16-bit range |
| No negative values | A file containing negative values is rejected |
| Matching geometry | Dimensions, spacing, and origin are compared against the active volume in the same way as a volume import |
Why a grayscale image cannot be imported as a mask
A grayscale 3D image stores intensities, not labels. A CT scan in Hounsfield units, for example, contains negative values for air and fat, and its range extends well beyond the label range. Importing it as a mask fails with a message saying the file could not be read.
Convert the image to a label image first, either with the segmentation tools in Volvicon or in the application that produced the file. If the goal is to view the image itself, import it through 3D Images instead.
Files stored as floating point, 8-bit signed, or 8-bit character values are rescaled to the range 0 to 255 before their labels are read. A grayscale image in one of these types will therefore import, but its intensities become arbitrary label values rather than measurements. Import it as a volume image if the intensities matter.
Creating Masks
Volvicon provides several segmentation tools to create masks:
| Method | Description |
|---|---|
| Thresholding | Select voxels within an intensity range |
| Region growing | Expand from seed points based on similarity |
| Manual painting | Draw directly on slices |
| Morphological operations | Erode, dilate, open, close existing masks |
| Boolean operations | Combine masks using AND, OR, XOR, subtract |
Mask Properties
Each mask has these properties:
| Property | Description |
|---|---|
| Name | User-defined identifier |
| Color | Display color in 2D and 3D views |
| Opacity | Transparency level (0–100%) |
| Visibility | Show or hide the mask |
| Volume | Total volume of the masked region |
| Voxel count | Number of voxels in the mask |
Working with Masks
Once created, masks can be used to:
- Visualize regions with distinct colors in 2D and 3D
- Measure volume, surface area, and statistics
- Generate surface meshes for 3D printing or CAD
- Analyze porosity, defects, or structural features
- Export as image stacks or binary files
3D Preview Modes
Volvicon can show masks in the 3D view in two mutually exclusive ways:
-
Mask 3D Preview (Mesh) calculates a surface mesh from the mask using the selected quality level. Lower quality levels downsample the mask before surface extraction. Use this mode for measurements, surface-based analyses, mesh inspection, and final presentation.
-
Mask 3D Preview (Direct) renders mask voxels directly as a GPU volume without generating a surface mesh. Use this mode for active editing, quick 3D review, and multi-label inspection.
-
Direct mode updates immediately when the mask changes.
-
Mesh mode requires preview generation and can optionally regenerate existing mesh previews automatically from Preferences.
-
Selecting any mesh preview quality switches masks out of Direct mode so the mesh preview becomes the active 3D representation.
-
The current direct-preview state is stored with the project and used as the default 3D preview mode for masks created or reopened in that project.
Related Topics
- Volume Grayscale Image – The source data for segmentation
- Surface Mesh – Converting masks to 3D surfaces